I recently bought the fantastic Lawn Fawn Plan-On-It-Calendar stamp set and some Memento Dew Drop ink pads with the intention of making my first scrapbooking agenda/planner ever!
Considering the amount of money I spent to buy these goods, I didn't have the heart to buy also a new planner to decorate....
I therefore decided to create the agenda from scratch with what I had at home!!!
Front cover: Canson brown 150 g/m² paper + scrapbooking paper.
Back cover: recycled cardboard + brown Kraft paper.
I've recycled the loops of a wire-bound mini notebook
...and used them to bind the planner!
I've decorated the front cover with a water-colored Swiss Pixie Tiny Heart stamp from CC Design Stamps and some die cuts from the Sizzix Scribbles and Splat die set and from the Florilège Design nesting tag die set.
While for the back cover, I've used the die cuts obtained with the Xcut Circle nesting dies, the Sizzix Scribbles and Splat die set and the Kesi'art MétaliKs Quatuor Smile die set.
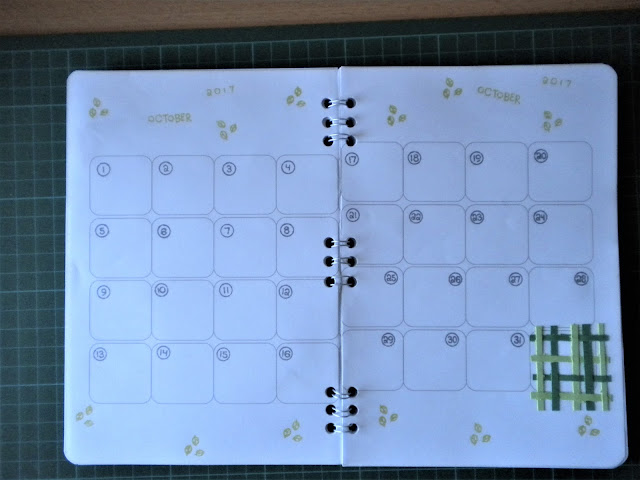
By using Power Point, I've designed the lined pages for the notes and the pages for the calendar (without a specific template, it took me quite some time to sort this out!!!).
I've then printed everything on A4, 80 gr/m², white paper sheets, resized and pierced each sheet and bound them all.
I've also created a dividing page with a pocket and a bookmark in it
...and some corners with the brown Kraft paper for pictures and drawings...I've hand-stamped every single number and month's name (as well as the tiny decorations) by using the cute stamp set below
It took me a while but it was worth it!
This is the LINK to the video on my FB page showing further details of this agenda (dimensions, number of pages, decorations, etc.)!
Well, what can I say about this project? It has been total fun, I'm incredibly happy of the result and proud of myself.
Next handmade notepad? Very soon ;-)


Comments
Post a Comment